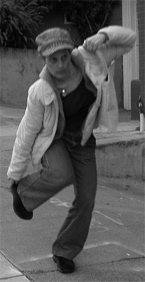
Creating Flexible Hips & Legs Without Stretching

Hi Everyone!

The workshop Creating Flexible Hips & Legs Without Stretching is coming up on Saturday, September 21 from 11:30- 1:30 p.m.  The early bird special ends on September 14th.  For more information about how to sign up click here.

I made a short video for you to get a snippet of what the workshop will be like. Some folks have asked, how can one become flexible without stretching. So I decided it would be great for you to experience it yourself.

Feeling the difference speaks much louder than just watching the video.  With that said, I suggest to watch the video only as a reference while you do the lesson on the floor.  Listen to the instructions and gently move through each movement, pausing the video, so you can find your pace. During this lesson always move in the range that feels good to you.   Focus on making the quality of your movements better instead of trying to attain a goal such as, reaching your foot.  Strive to become graceful in both directions of movement.

The words of Dr. Moshe Feldenkrais are “make the impossible possible, the possible easy and the easy elegant.”  

I am confident that when following my suggestions you will become pleasantly surprised by the results!  Have fun!

Donna

Helping a Runner Get Her Stride Back

Hi Students:
The Improving Through Movement studio will be closed from August 10-24.  There will be no Feldenkrais classes at Core Wellness Yoga on Wednesdays, August 14 & 21.  Please make note of these dates in your calendars.  Following are the titles of the workshops I will teach in the next three months:  Finding Comfortable Zen Sitting; Creating Flexible Hips & Legs without Stretching; and Ease into the Wheel Yoga Pose by Improving Upper Back Flexibility.  To find out more details click on the workshop that you are interested in.

In this short video I am working with a runner.  She came to me complaining of feeling heavy and weighted down while running long distances.  She also was experiencing neck and jaw pain.  This is the beginning of a 45 minute lesson.  You will see that I started this session by rotating her heels from left to right.  Notice that the rotation only moves to her knees and her hips move very little.

I discover at this moment one of the reasons why she feels heavy when running.  If her foot lands on the ground and the movement stops at her knees, her ankles will have to do most of the work to propel her forward.  Also the force of energy from her stride will be abosorbed by her knees mostly which can cause injuries later to her leg joints.  After working with her legs for a short time, I rotate her heels again.  Notice the rotation improved and travels through to her hips and her pelvis.  This will help her not to over work and the force of energy will move through more joints when she runs.  This will help prevent wear and tear on her ankles, knees and hips.

During the rest of the lesson, I connected her leg movements through her torso to her head.  I showed her with my hands, that the 24 vertebrae in her back could also absorb the force of her running stride, helping to protect her back, neck and jaw.  Later she reported feeling lighter on her feet when she ran.  She attributed it her broader range of movement and a new understanding and awareness of herself.

Enjoy the rest of your summer!
Donna


Increase Your Oxygen Intake by Expanding Your Diaphragm Movement

Hi Students:

My next workshop is on Sunday, August 4, entitled, Finding Comfortable Zen Sitting. Save the date and I hope to see you there.

You can increase your oxygen intake when your diaphragm is able to expand in all directions within your torso, like a balloon filling with air.  This lesson will help you learn how to expand your diaphragm movement.  Afterwards do not think about breathing.  Observe throughout your day, if you take in more air with each breathe, without trying.

I made this video while teaching a student.  This is the beginning of her lesson.

I suggest that you lie down on the floor and do the lesson while listening to my instructions, like you would during a class.  I also suggest not to watch the video before doing the lesson because without feeling the movements you will probably loose interest.  Instead refer to the video if you don’t understand something while doing it.

I dedicate this video to all my students in San Francisco including:  Janet, Tina, Darryl, Steve, Kent, Jerry, Peggy, Nancy, Linda, Greg, Jobyna, Karen, Carmen, Sabrina, Maureen, Mike, Amy, Hafsa, Julie, Rob, Phillip, Avi, Craig, Patrick, Ernest, Jarvis, Nora, Naren, Bill, Leslie and Joan.  I miss all of you dearly (even if I didn’t mention your name).  I am excited to teach all of you from afar!  Enjoy!

Donna

When you Listen You Can Have Harmonious Relationships

Hi Students:

Take note of a few reminders and please mark some dates in your calender.  Improving Through Movement will be closed the week of June 15 -22.  There will be no Feldenkrais class at Core Wellness Yoga on Wednesday, June 19th.

I am sharing a wonderful video this month, of a Father, dancing harmoniously with his child.  It is beautiful to watch the way he listens to himself, his child, the space around him, and the other dancers with all of his senses.  You will notice that without looking he feels where his child is at all moments. One can see that the communication between Father and toddler is happening without words.

You don’t have to be a dancer to learn to listen in this way.  You can learn to listen during a Feldenkrais class.  There you will learn how to sense, feel, think and move gently on the floor.  Each lesson may challenge you mentally, physically or emotionally .  In a class with other people you will start to sense the person moving in their space next to you and eventually all the space around you.  Later you can take with you, this gentle way of attending into your life and relationships.  Dancing with another is taking listening to the next level.

One of many reasons, I teach the Feldenkrais and Child’Space methods is because I learn to sense more completely.  This carries into my life.  My relationships with family, friends and students continue to grow more harmonious and richer with each year.  This I am very grateful for.

Sincerely, Donna

A TED Talk: Do Schools Kill Creativity?

Hi Students:

I am excited to announce my next workshops and a new class.  Starting on May 7, I will be teaching a Pregnant Pauses movement class for expecting women, for six weeks.  On May 11th, the early bird special ends for the workshop, Yet Some More Ways to Improve Your Posture .  On June 2nd, I will be co-teaching a workshop with a Zen Buddhist priest called, 3 Secrets that Will Help You Get the Most Value from Your Meditation Practice.  For more information click on the event that you are interested in.

I have included a TED talk that I thought you would enjoy.  It is about creativity and the importance of educating our children fully through moving, thinking, sensing, and feeling.  Through the Feldenkrais Method I am able to help my students in this way and is why this talk caught my attention.  It brings me hope knowing that this message is touching more and more people.

Sir Ken Robinson stresses throughout his talk the imbalance in our education systems and how this is squandering the tremendous talents our children are born with.  He tells a wonderful story about how a famous dance choreographer was born when her doctor prescribed her to take dance lessons.  He told her Mother that her fidgety daughter “wasn’t sick, instead she was a dancer”. 

Sir Robinson goes on to say, “If you are not prepared to be wrong you will never come up with anything original.  By the time they become adults most kids have lost that capacity.  I believe this passionately, we don’t grow into creativity, we grow out of it – or rather we get educated out of it.”

In summary, I think along with Sir Robinson, that the future world our children will be living in, will require one to be more creative then one has to be currently, to be able to function in it.  He wraps up saying, “What TED celebrates is the gift of the human imagination.  We have to be careful now, that we use this gift wisely. Our task is to educate their whole being so they can face this future.”

Sir Ken Robinson, is quite entertaining in his delivery.  He makes some very important points and I encourage you to listen to it to the very end.  Feel free to email me about your thoughts!

Sincerely, Donna

Expanding Your Breathing

HI Students,

Following is a lesson to help you broaden the areas available for you to breath.  Remember that every moment in life requires breath to change.  This exploration is designed to teach your diaphragm to move and expand in different directions.  This will help to open you to more flexibility in your life and demeanor.

The next three workshops I will be teaching are in April, May and June.
~Donna

During this lesson move gently into the position explained and  stop where you feel most comfortable.  Breath as directed, in a natural manner using awareness and curiosity to guide you.   After each movement sit back in your chair and rest before going to the next one.  Have fun and enjoy!   ~Donna

1)  Sit at the edge of your chair and place your hands on top of your head with your elbows out to the sides.  Move your head and elbows to the left and stay where you feel comfortable.  In this position direct your breath sideways into the right side of your ribs, many times.  Imagine your right lung expanding towards your ribs near your armpit, in the middle and near the lower ribs.  Sense that when you inhale each rib on the right side moves further away from each other and when you exhale they move closer together.  Rest.  Now try the same exploration to the other side.

2)  This time, sit and hug yourself with your hands on opposite shoulders and your elbows resting against your chest.  With your head and eyes, look down towards your belly, round your back and roll your pelvis backwards.  Stop where you feel most comfortable.  Direct your breathing towards the floating ribs near your lower back area.  Sense the ribs in the lower back area on both sides, widening on the inhale and narrowing on the exhale.

3)  Sit and place your hands on your forehead with your elbows facing forwards.  Look up with your head and elbows and allow your pelvis to roll forwards so your tailbone will face the back of your head.  In this position, direct your breath towards your lower belly area and downwards towards your pelvic floor.  Sense your belly becoming round like a pregnant belly on the inhale.  On the exhale sense the belly move inwards and upwards.

4)  In the same starting position as in #3, direct your breath towards your chest and upwards towards your clavicles.  Sense when you inhale, your sternum from the inside of yourself moves away from your vertebrae between your shoulder blades.

5)  Sit back in your chair and observe how your breathing has changed.  Walk around and observe your breathing.  Notice throughout your day how your breathing changes depending upon your activities, and your emotional and mental state of mind.

A Lesson

Hi Students,
Following is a lesson for you to explore during your day.  Look at the previous post to learn how to register for the More Ways to Improve Your Posture workshop, on March 23!  Sign up before March 2nd to get the early bird special and to ensure your space.

During this lesson move gently without forcing or stretching.  Focus on how you do the movement as well as on how you return each time. After each movement sit back in your chair and rest before going to the next one.  Let your curiosity guide you.  Add any variations that you can think of, to this mini-lesson.  Have fun and enjoy this exploration!   ~Donna

1)  Sit at the edge of your chair so you are not touching the back of it.  Place your feet underneath your knees so there is a 90 degree angle in your hips and knees.  Place your right hand on top of your head and very gently move your right elbow and head to the right so your right ear moves toward your right shoulder and return.  Make sure that when you do this movement that your head and eyes stay facing towards the front of the room.

2)  Repeat the same movement (#1), and this time notice what kind of shape you make with your spine.  Is the shape more like the letter “c” or the letter “r” when you move to the right?  Make it more like the “c” ; then like the “r”.  Sense how you move differently to do this.  Which one feels easier to create?

3)  Repeat the same movement (#1), and notice this time when you side bend to the right, which sit bone gets more weight?  When you make the letter “c” with your spine does a different sit bone get more weighted then when you make the letter “r”?

4)  This time place a folded towel or garden pad underneath your left sit bone.  Sit and feel that your left sit bone is now higher than the right sit bone.  From this starting position gently lift the right sit bone off the table and then place it back down.  Which foot helps you to do that?  Keep your whole foot on the floor as you do this movement.

5)  Repeat the same movement (#4), and notice if your spine is making a letter.  Is it more like the letter “L”; or a tilted “I”; or the letter “c”?  Does your head move to the left or to the right or does in stay in the middle?  Purposely create the tilted “I” and sense where your head moves.  Now create the “L” and sense your head placement.  Lastly make the letter “c” and follow the path of your head in space.

6)  Start this movement with you right hand on top of your head and the elbow out to the side, and with a towel underneath your left sit bone.  At the same moment you move your head and elbow to the right, lift the right sit bone off the table.  Can you create a letter “c” in your spine moving from both ends of yourself?  Gently and slowly explore this movement distributing the “c” curve throughout your vertebral column more and more evenly.

7)  Do the first movement (#1), and feel what has changed.  Repeat all the movements on the other side and notice if it is easier or harder on the left side.

2013 Workshops: Improving Posture

I am excited to announce that I will be teaching three workshops in 2013 in Lancaster, Pennsylvania on:
Sat., January 26:  3 Essential Ways to Improve Your Posture;
Sat., March 23:  More Ways to Improve Your Posture;
Sat., May 18:  Yet Some More Ways to Improve Your Posture

I am including a video of Feldenkrais Trainer, Ruthy Alon because she demonstrates beautifully and verbalizes so eloquently very important concepts that one of any age can do to re-organize the back for a strong and vital posture.  Ruthy says (at 3 minutes into the video), something that if understood could change your posture dramatically, “In ever changing life you need a wise stomach.  A stomach that knows how to make an effort when needed and how to keep out of the way when not needed.”

I emphasize this quote because during these workshops I will help you to understand her words organically.  I realize that what she says is an uncommon philosophy from what most people hear in the mainstream when they are searching for “good posture”.  By the way, Ruthy made this video when she was in her 70’s and I think that says it all!  Sign up early for one or all three workshops to learn more ways to sucessfully create the posture and self image that you desire!

All workshops will take place from 11:30 a.m. – 1:30 p.m.  The fee for each workshop is $40.00 for early registration by Jan. 12, March 2 and May 4 and is $55.00 there after.  If one chooses to sign up for all 3 workshops by Jan. 12th then you will receive a free 15 minute phone consultation with Donna.  To sign up contact Donna at 717.285.0399 or email her at: donna_bervinchak@yahoo.com .

Have a wonderful holiday season and winter solstice!
Donna

A Turning Lesson

Hi Students,
I decided to share another lesson in sitting for all of you based on popular demand.  This is a great lesson to help improve your game of golf, tennis, softball, etc.  Have fun with it! 

During this lesson move gently without forcing or stretching.  Focus on how you do the movement as well as on how you return each time. After each movement sit back in your chair and rest before going to the next one.  Let your curiosity guide you.  Add any variations that you can think of, to this mini-lesson.  Have fun and enjoy this exploration!   ~Donna

1)  Sit at the edge of your chair with your knees and hips at about a 90% angel.  Place your right hand on your shoulder and let your elbow rest on your chest.  Turn your head, eyes and shoulders as far to the left as you can comfortably and notice the farthest thing you can see and then return to where you started.  Do this movement several times noticing how your pelvis and legs move with your upper body.

2)  Start in the same position and this time as you turn to the left with your head, eyes and shoulders allow your right knee to become longer than your left.  Don’t allow the feet to move on the floor as you do this.  Instead feel that when the right knee lengthens the pelvis turns to the left.  When you return to the starting position notice how your pelvis turns back to the right as your knee shortens.

3)  Do movement #1 and feel what has changed.

4)  In the same starting position, turn your head, eyes, shoulders and pelvis to the left and stop at your farthest comfortable place.  Stay turned this way and only turn your head and eyes back to the right and then to the left again, many times.  Feel how you are turning your head independently of your shoulders.  (pause)  Turn everything back to the starting position and take a rest.

5)  Turn all parts of yourself to the left again and stay there.  This time only turn your shoulders back to the right.  Keep your eyes looking at something and this will help you not to turn your head with the shoulders.  Feel your right knee staying longer than the left one and this will help you not to turn the pelvis along with your shoulders.  Move very slowly and gently so you can be aware of what you are actually doing.  (pause)  Come back to the starting position and rest by walking around the room a bit. Continue reading A Turning Lesson

Baby Moves

Dear Students:

I have been wanting to share this video of Baby Liv with all of you for quite awhile.  Watch carefully and see if you recognize parts of some  Awareness Through Movement® lessons that you learned in the past during a class or private session.  I suggest to use the movements that you see to remember some lessons and then get down on the floor and start exploring.  I think you will find that your memory will be sparked and you will start remembering what you thought you had forgotten!  This way of exploring will enhance your creative abilities and curiosity.  Have fun!

If you are new to this way of learning, watch how this baby is preparing herself for sitting, crawling, and eventually, walking.  When I work with babies it is quite obvious that I am assisting them through developmental movements so they can learn to do them on their own.  When I work with adults and older children, I am taking them through the same process, it just may not seem like it.

If you have any comments or questions please feel free to contact me.   I would love to talk with you!

Sincerely, Donna